A router is a tool that is used for routing or hollowing out pieces of wood. It is an indispensable tool when it comes to woodworking, carpentry, or cabinetry. Almost every woodwork involves the use of routers.
If you’re a carpenter or involved in carpentry, you definitely need a router in your arsenal. They bring perfection and adds a finishing touch to the workpiece. Therefore, a workpiece is left incomplete without the use of a router.
There are many kinds of routers available in the market. Some of them include a trim router, plunge routers fixed base router, and so on. Among them, the plunge router is a noteworthy instrument.
The plunge router is named after its plunging ability. This ability to plunge the router manually to cut wood offers more control and precision. Using this instrument might seem a bit daunting at first, but with proper instructions, its not much of a challenge.
In this article, we will show you how you can make use of the plunge router effectively and efficiently.
In this post we'll cover:
What is a Plunge Router?
A plunge router is an electric-powered router that cuts by manually plunging to the base and routing the wood. There are generally two types of routers, the fixed router, and the plunge router, the latter being more used by workers.
These routers offer great utility in every workshop. They can cut into places where other routers can’t reach easily, if not at all. Applications of plunge router include cutting mortises, worktops, decorative edges, decorative works, use with jigs, etc. These routers are also great for template routing.
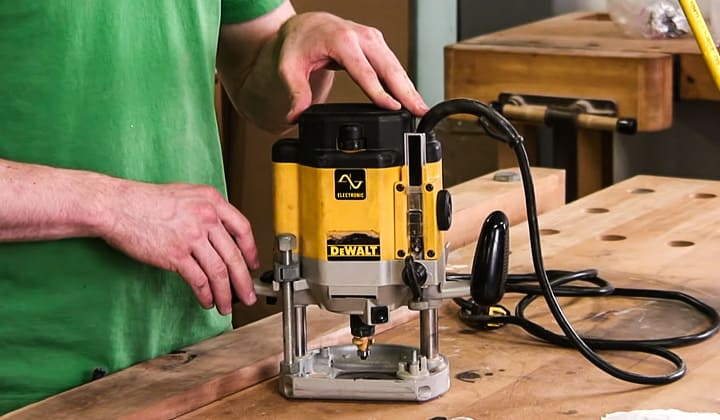
The motor of a plunge router is lifted vertically from the base with springs and two bars on both sides. The collet and nut are attached to the bottom of the router. There is also a depth adjustment mechanism on a plunge router and speed control knob on top of the motor.
You have to attach the bit on the bottom of the motor into the collet. Since the router has to plunge manually into desired depth, a lot of intricate cuts can be made precisely and accurately. Thus, the plunge router is a very versatile tool.
Applications of Plunge Router
There are many uses of a plunge router in woodworking. It is a very versatile instrument. Some of the things a plunge router can accomplish are-
- Cutting mortises.
- Dowelling.
- Grooves or dadoes.
- Circle or curved routing.
- Inlay.
- Making keyholes.
- Making signs.
You can see that this instrument can clearly accomplish a lot of tasks. That makes it a really versatile instrument to have.
How to Use a Plunge Router
Using a plunge router often seems hard for beginners. In fact, using a plunge router isn’t as difficult as one may think of it to be. With proper instructions and guidelines, one should be able to handle this powerful tool with ease, and with some experience and practice, one can make excellent use of it.
We will now show you how you can make use of the plunge router in the best way possible.
Preparing the Router
A plunge router is a power tool. Just as every power tool requires inspection and preparation before use, so does this one. You should always pay attention to whether the router is fit for work.
Always make sure to check if the router is in proper working condition. Don’t use the router if it has issues in an electric connection or has a faulty connection. Also, don’t forget to check which direction the bit rotates when used, as this is required to cut wood efficiently.
Use and Install Proper Bit
The bits of the plunge router varies depending on your task. Generally, most of them are ¼ -inch bits. But they can vary too depending on the work.
If you are going to use a plunge router, you must know how to change and install a bit. We are going to show you how you can do just that.
- Make sure your device is unplugged from the power socket before you fiddle with the bits. If not, then unplug the unit and then begin the procedure.
- First off, unscrew the nut with the wrench to loosen it up.
- Then, hold the black lever and turn the spindle to release the old bit from the collet.
- After that, hold the lever and slide in the new bit into the collet.
- Slide the new bit all the way in and then pull it back out just by a quarter.
- Turn the spindle to lock the bit in place.
- Tighten the nut with hand first and then use the wrench to tighten it properly. Make sure the bit tightened really tight as a loosened bit can cause serious accidents.
Now, you should be able to change or install a new bit.
Adjust the Depth of the Router
The router is named after its ability to plunge manually. The depth of the router can be adjusted by hand. A lot of things depend on the depth of the router from the base, such as the shape of the cut, the amount of cut, etc.
Let us discuss how to adjust the depth of a plunge router.
- First and foremost, place the router on the router table. If not on a router table, then make sure the bit it a little bit away from the wood that has to be routed.
- Plunge the router into the desired height.
- Then, flip the switch that locks the router in place. It should be around the motor casing on one side of the router.
Routing the Wood
Now, it is time to put the plunge router to work. Connect the router to the power socket. Check if the device is working properly.
Start the router by flipping the switch up to check the direction of rotation of the bit. Move the router from left to right according to the router’s rotation. Turn off the router by toggling the switch after you’re done.
Advantages of Using a Plunge Router
Among the unlimited uses and benefits of a plunge router, some stand out above the rest. They make it so that the instrument is a must-have for every worker and essential for workshops.
Some of the advantages of using a plunge router are-
- A plunge router can cut in areas where most other routers cannot reach. They have the ability to move up and down from the base. That gives it height adjustment options, which can contribute to making unique cuts and grooves.
- Plunge routers are great for template routing. Their functionality makes it much easier to route templates compared to other routers.
- These instruments are perfect for making inlay grooves. The plunge router is suitable for delicate and clean works. It is really convenient to make smooth inlay grooves with the help of a plunge router.
- It comes with a built-in adjustment scale, which allows the user to perfectly measure and make accurate and precise cuts.
- Plunge routers have built-in bit protection. That means accidents occurring due to loosened bits are pretty rare with plunge routers.
- The plunge router is the best instrument for cutting mortises. The router focuses on accuracy and precision. As a result, perfect mortises can be cut out with the help of plunge routers.
Due to these advantages a plunge router provides, they are really worthy of purchase in every workshop.
Safety Tips for Using Plunge Router
When it comes to safety, the plunge router is a really safe instrument. Yet, power tools can be deadly when proper safety measures aren’t adopted. Every power tool has a chance to cause potentially fatal accidents.
The plunge router isn’t any exception when it comes to risk factors. You should know about them and take safety measures to prevent them beforehand.
We will now give you some safety tips when you’re using a plunge router.
- Make sure the power connector isn’t faulty. Faulty connections may cause a short circuit or other problems.
- Always wear personal protective equipment. Eyes are especially exposed to flying scraps of wood. Not wearing safety glass can cause eye damage or even result in lost eyesight.
- Make sure the bit is securely locked in place. If not, the bit might come off and shoot out really fast. This can cause serious damage to the surroundings, including the user and other people.
- Keep the router a little bit away from the wood before starting the router. After the router turns on, pull it closer to the wood and then route the piece. Turning the router on while the bit is attached to the wood introduce kickback, which can mess up your work or cause accidents.
Final Thoughts
The plunge router is an extremely versatile tool. It totally belongs in any workman or professional’s kit. Being superior to most routers, it is always great to know how to use this kind of router properly and efficiently.
Following our guide, you should be able to work your way up with the plunge router, whether you’re a beginner or an amateur. We hope you found our article on how to use a plunge router helpful.
Related – How to use a trim router

I'm Joost Nusselder, the founder of Tools Doctor, content marketer, and dad. I love trying out new equipment, and together with my team I've been creating in-depth blog articles since 2016 to help loyal readers with tools & crafting tips.